Friday, February 25, 2011

Snow and Soup


Hello everyone! I hope ya'll have had a really good week. Today is Friday. YAY!

So, yesterday we had a wonderful amount of snow fall. We got about 3 inches and everywhere I look has a most beautiful coat of snow. I went up in to West Omaha yesterday just as the snow was trying to start (in the event that the snow REALLY came down) I wanted to be sure we had enough coffee in the house to be able to withstand being snowed in. AND I also wanted to pick up a few things so I could make a craft item that I thought up. Not exactly sure how it will work, but I picked up the necessary things in order to make it so we'll see.... I'm going to begin work on it this weekend. ;-)

Back to the subject. Yesterdays snow.


It was so pretty. But, driving in it wasn't. It was rather dicey until the snow plows showed up. Then the roads were quite drive-able. It always amazes me how so many people drive too fast in snow. On my way home, there was a truck that I thought was going to slide on top of me. He was (yes, it was a man no less) who was driving too fast and began to slip and slide and suddenly he stopped half way up a hill. I saw it and realized that he had stopped as I was beginning my climb. I slowed down even more and was thinking about cutting onto a side street to avoid him. Just as I was about to do that, he got his truck moving and going up the hill. And wouldn't you know, after he got up the hill he sped up. Still slipping side ways, mind you. ACK! Driving in the snow is not difficult. But driving in the snow trying to avoid getting into accidents with other (less safe driving) drivers is a whole other story! Sheesh!

Okay, done with the snow part and on to the soup part.

A few weeks ago I found a new blogger. She is actually a relative to a friend of mine. It is Rhonda at "What's Cooking with Rhonda". Well, I went back to see what other posts had been put up and found a recipe for Lasagna Soup. It sounded quite intriguing so I decided to make it yesterday. It was a cold day with lovely snow, why not have a nice warm bowl of yummy soup. Right?! Well, I must tell you. This soup is wonderful! And amazingly enough it does taste like Lasagna! We had invited our neighbors son (neighbors are on a trip and their teenage son stayed home because he didn't want to miss school) and he LOVED the soup. So much so that he asked me to give his mom the recipe! I altered it somewhat. I felt that it needed some herbs that I normally put in my Lasagna recipe. And once I had done that, it just put it over the top! And it's really a very easy recipe.


*****************************

Yummmmmmm!


Lasagna Soup

2 pounds ground Italian sausage
4 cups diced onions
2 cups diced carrots
4 Tbsp minced garlic
1 1/2 tsp. oregano
1 tsp. basil
2 tsp. parsley
8 cups chicken broth
2 lrg. (28 oz.) can crushed tomatoes
1 (15 oz) can tomato paste
4 cups sliced mushrooms
1 cup campanele pasta, uncooked
2 cups fresh spinach
shredded mozzarella cheese
shredded parmesan cheese

Brown meat, onions and carrots with garlic. Add broth and crushed tomatoes and bring to a boil. Reduce heat and simmer for 20 - 30 minutes. Add tomato paste, mushrooms, pasta and cook until pasta is al dente. Add spinach and cook until wilted.

Serve soup with mozzarella and parmesan on top.

(Rhonda's note: When I made this I was a half cup short of the 4 cups of onions. I had some asparagus left over from the previous nights dinner. I put it in the food processor with the carrots and put that in the soup too. I think you could play with this recipe a little if you wanted to add different vegetables. Kids probably wouldn't even know.) Enjoy!!

**I added the oregano, basil and parsley since those herbs are also in my lasagna recipe and it made the soup taste even more like my regular lasagna dish!

*******************************

So, there you go. A most delicious comfort food in a bowl! Give this recipe a try and tell us what you think!

Now, I must be off. I've got a sock I'm working on ya know! ;-)

Ya'll have a great day and I'll see you back here soon!

Wednesday, February 23, 2011

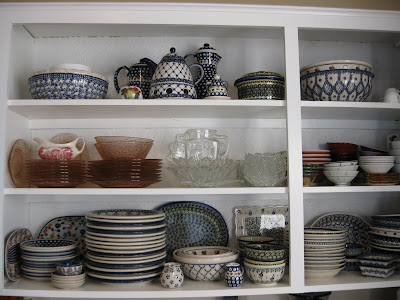
South side Kitchen cabinets done.


Hello everyone!

So, I have FINALLY finished the south side. I'm sure there are those of you out there that are saying... "well, why didn't you just do the whole kitchen?" Well, let me tell you. I have to do this in small spurts or I will go CA-RAAAAZYYYYY! It drove me absolutely bonkers to have all my dishes scattered around the dinning room and kitchen! The next set of cabinets I'll be working on will be the west side of the kitchen and those have all my baking ingredients and paraphernalia in them. I'm not sure how I'm going to manage having all those things scattered around!

Anyhow... It's not really too much of a change. But it will do until we can do our total kitchen renovations in a few years.

Before


After


I really like the way the back of the shelf wall turned out.


I still would have liked the beadboard look better but this will work for now.


This is the south side of my kitchen.


It still looks rather old and tired. But if you could have seen the shelves up close you'd have seen how REALLY old and tired they looked. Now at the least the paint perked it up somewhat and it looks clean. I think I can live with this for two and a half more years. One thing is for sure. It was alot easier to cut the wallpaper for the back of the shelves then it would have been to cut wood (bead board)!

Tomorrow, I'll show you how far I've gotten on my socks. (No, I have not finished them yet!)

Hope ya'll have a great day!

Saturday, February 19, 2011

Socks...?


Hi All!

I have begun! I started my socks. Actually, I'm knitting my first pair of practice socks. I picked up a book written by Melissa Morgan-Oakes. She is the Best-selling author of 2-at-a-Time Socks. I had seen her book some time ago and thought "oh, how cool". But then put it back on the shelf and proceeded to purchase other knitting books not having anything to do with the making of socks. But! The other day, I saw THIS BOOK!


And, as you can see, this book I did not put back on the shelf... noooooo. This book I picked up and purchased because... This looked like the book for someone like me!

I know myself. I know that if I were to make a sock, I'd probably get the first one done and then never get around to making the second one. It's true. It's one of my many flaws. I get bored easily and I want to be able to say "done that" and then move on to something else. And it's probably the reason why, although I have a bunch of sock yarns in my stash, I've yet to make a pair of socks. I'm sure ya'll remember my "yoga sock" fiasco. What a mess. I never even finished that one sock and I'm sure I wouldn't have finished the mate to it had I even bothered to finish the first one! So... what makes this sock project different you ask? Well, let me tell you.

Firstly... This author teaches you how to make TWO socks at ONE TIME!

Secondly... This author teaches you how to make TWO socks at one time from the TOE-UP!

That means that for someone like me, who is constantly wanting to check if everything is going accordingly, I can actually put my foot into the sock to see how much further along I need to go in order to get just the right fit. I don't necessarily HAVE to rely TOTALLY on my math skills (which, I must admit, is rather poor).

Thirdly... I can get little bits of instant gratification every time I am able to put a little more of my foot into the ever growing sock! I mean seriously! Who doesn't love being able to get bits of gratification as you go along?! ;-) LOVE!

This author is a GENIUS!

I looked through this book at least 10 times. Then I read all of her directions three times. Then I looked at the patterns she has in the book. And all this I did IN the book store before I even bought the book! Then I took it home and looked through and read it again and got so excited because I think (feel strongly) that I can do this! Of course, I didn't have the circular needles that I needed so I had to go to the knitting shop to get those. But I had the yarns so, yesterday, with needles and yarn in hand, I cast on and started.

So far so good! I've got the beginnings of the toe bed made. It hasn't been too difficult and I've only ripped out my work once. I'm sure it was me and not the authors fault that I had to rip out the first attempt. Thankfully that happened after the second row so I hadn't gone very far and the author was kind enough to give little directional check ups along the way and that is how I figured out I had gone wrong at the second row. I LOVE THAT!


I'm at the point where I think I'm doing it right. The directions aren't as clear at this point as I would like. But then, it's probably just me being "not so bright". I'm not so clear as to how many actual rounds I'm supposed to do and not exactly clear on when I'm supposed to make my increase. But, I'll just keep plugging away and see what happens. At least there are pictures that I can look at to see if mine is looking like hers. And it's only the sample sock so.... oh and did I mention that the sample sock is small? Like for a toddler size small? So, not only will they not take as long to complete, but, in the event that I do get these completed, my grandbaby will have a pair of socks that are two different colors but still a "pair" of socks! And I really do think that the excitement of having completed my first pair of socks will be so great that I might attempt another sample pair in the same colors just to get more proficient in sock making and then my grandbaby will have TWO PAIRS of socks! ;-)

Okay, now that I've shared this with you. I want to get back to knitting some more on these socks. But! I cannot. I must go back to work on my kitchen cabinets. My house is a wreck with dishes everywhere and painting things ever where else!

Tonight. Tonight I will get to play with my knitting!

I hope ya'll have a great weekend! And......I hope to have the South Side kitchen cabinet reveal on Monday. (Still trying to decide what I'm going to do with the West Side of the kitchen cabinets). Blah.

;-)

Friday, February 18, 2011

How to say thank you...


Hello everyone! This post is about saying thank you to a special friend.

Okay, so I wrote out a waaaay long post about my two longest known friends (I'm a military brat so, that's a whole 'nuther story in and of itself, but if you know anything about military life that explains alot about friendships and the term "longest known friends".) But I scrapped that post because I realized I was a bit too emotional for the blog. I wanted to explain how much these two specific friendships mean to me. And then, realized that it would probably make them uncomfortable. Mainly because these friendships mean more to me then it means to them. (They are normal, I have issues.) ;-> So having said that...

My friend Corinnea, whom I've known now for 18 years but haven't seen since... 2003(!), sent me a package two days ago. In it were two items she made for my grandson! And, two items she made for me! I am SO happy that she thought of my grandbaby and me. And I am SO embarrassed at the same time. Because she recently had a grandbaby too and did I send her or her grandbaby anything? NO! Not only did I not make him anything, but I did not buy him anything either. Anything I could make, they (my friend and her EVER talented daughter) could make better! That also goes for anything I could have bought! So, I did nothing. (So much for showing my friend how much she means to me eh?) Then I get this package and I just want to cry.


She made my grandson THE most adorable backpack and the blanket is so cuddly! It's soft and fuzzy and I'm sure he's going to take the longest naps with it! ;-)


Just look at the swirly fuzzy fabric! And it is SO soft! (I almost want to keep it myself!) ;-)


Oh my! These pictures just don't do these items any justice at all! Trust me when I tell you, these are SO much better in person!

(I really need to work on my picture taking skills!)


I've already put my bags to use. The long tubular bag hold the necessities for my IPad paraphernalia and the larger bag I have my camera items, ie., instant camera, cords, mini tri-pod and lens cleaner. I LOVE them! And I can't wait for you to put more bags up in your shop so I can purchase others! (I adore bags of all shapes and sizes! It makes me feel so organized!) ;-)

Thank you! Thank you! Thank you!

And while I was trying to write a post that would not make you feel badly in any way... because I certainly didn't intend for you to feel anything but happy and good about your lovely and very thoughtful gifts. I do want you to know just how much YOU mean to me and how deeply your thoughtful gesture has touched me. AND in the process of writing this, I actually came up with an idea for something that maaaaaayyyyyybbbbbbeeeeeee, might be Micah worthy!

So. I end this post with a less guilt ridden thank you and a more hearty THANK YOU!

Love you Corinnea!

Thursday, February 17, 2011

My old house.


Hello folks!

Hope everyone is doing well. Thanks for all the "grandbaby love" in the last post. I think he's just about the cutest little guy ever! Hopefully I'll be heading out to see him in a couple of months! Not sure how much longer I can stay away from him.

And so... one of the many reason for working on my kitchen. It will keep me busy and not focus on how much I'm missing of grandbaby's many new accomplishments. (Evidently he is now mobile! Waaaaah)

I've talked about how our house used to be the Community Church in 1915. And how it was converted into a house in 1930. Well, I don't think the kitchen has had anything done with it since it was first put in. Initially (last September) I took off three of the cabinet doors thinking to strip them and then repaint them because..... My Honey said (at the time of purchasing this house) that we would have to wait 5 years before we could renovate the kitchen. And at that time I was just so happy that he wanted to buy this house (because we had only recently bought our other house) that I would have agreed to just about ANYTHING! Since then, I've come to despise my kitchen cabinets. Okay, AND counter tops. And floor! And sink. But mainly the cabinets. The cabinets were gross! No matter what I used. They were sticky. Like the paint had developed some kind of sticky residue that would NOT come OFF! Plus the paint was chipping and the inside of the cabinets were lined with sticky backed shelf liner in a baby pink floral design which was peeling away in places and then there were some interior cabinet walls that were not painted and was all brown-ish looking. Anyhow, when you looked at them it made you wanna say "eeeyyyyuuuuu". Well, it did for me anyhow.


This is what the doors look like. Definitely old looking. There is some paint chipping on the doors.


Here are some "eeeyyyuuuu" shots.


Can you see where the shelf liner is beginning to pull away and bubble up. (Top shelf in case you don't see it)


You notice that the doors have been removed on the one set of cabinets. I had started the paint stripping of the doors last year and then the weather got cold and I stopped. So, over the holidays, I was without doors. And then My Honey and I decided we sort of like the "no doors" look so... I decided that we would just go doorless. At least, on this side of the kitchen. I'm still un-deciding about what to do with the other cabinets.

So yesterday, I ripped out all the shelf liners and found that there were shelf paper that was stuck on the shelves. So with a bucket of diluted T.S.P. I got to work cleaning and wiping down the cabinets.


Gross!


Clean at last but still yucky to look at. Love those particle boards. NOT!

Then, I had picked up some paintable wall paper and applied it onto the backs of the cabinets. I had initially thought about getting some Beadboard shelf paper but all the ones I found did not have enough of a raised design on them so had I painted over them, the design would have disappeared and... well, it would not have worked. So, I found this tin ceiling tile paintable wall paper and thought it would do. (Seriously, it will only be up for a couple years and then the REAL renovations will begin).


Here is a close up of the wall paper.


Another shot of it up in the cabinets. Don't mind that it's not up there perfectly. I'll be painting the whole thing today.


The cabinets are not level or squared. It sags in some places and the spaces are all UNEVEN! I had to cut each section of the wall paper individually because none, I repete, NONE are the same height! (Ahhhhh, the beauty of having an old home.....) :-)


So this is what I've gotten done so far. I'll keep you posted on this little (ha!) project as I go along.

I hope you all have a great day! See ya back here soon! ;-)

Wednesday, February 16, 2011

Silly little bibs and our little model...


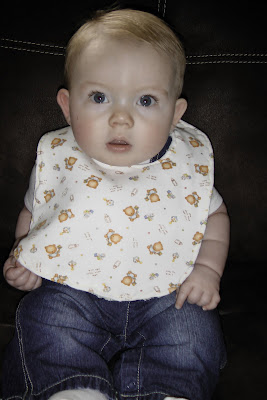
Hello everyone! I just got some pictures of my little grandbaby wearing the bibs and blanket that I made for him. He is growing so quickly! And his hair has gotten longer! (his daddy didn't have hair for over a year!) And he's even looking more and more like his daddy did (except for the hair) at this age. Although, I still see his mommy in him too. He's a little chamelion just like his mommy! A running joke in our family is that Dillygirl looks different in every picture she's in. Anyhow. Here's the little cutie. And just so you know, this child can make anything he wears, look adorable! ;-)

Even stuff his Nana makes.


And here he is with his upside down bib.


There you go. Just a few of the pictures that I have of him. I could put more up but, I don't wanna bombard you with all of them. ;-)

So, I guess I need to make more things for him. They do say.... "Practice makes perfect" don't they? ;-)

Hope ya'll have a great day and I'll catch you back here again very soon!

Friday, February 11, 2011

Phew. All done!


Hi all!

So, I finished the quilt yesterday. I'm going to say that I got it completed on time and then just barely. But the reality is, her birthday was on the 1st of February and I only managed to give it to her yesterday. Fortunately for me, she is a sweet and wonderful woman.

The colors are all spring timey (that's a word isn't it?) ;-) I know that Ms. Orlu is a bit tired of the cold so I thought these colors would remind her of spring and how it is on the way, even though we've had temps at -8 deg. in the past few days! Today it's supposed to get up into the 30's! Yeah!

Anyhow, I know that I did not do the binding correctly. Yes, I KNOW I didn't. But, that's okay. If I had done it correctly, it would have been another week before I could give it to her. I did what I had to do in order for it to be completed in a relatively timely manner. And if you're not a quilter you'd never know that is was wrong.

The really good thing is that she isn't up on the correct way to make a quilt. She's always saying how she's not the "crafty" sort. She didn't do hand work type things so she was so happy to get something that I made by my own little ol' hands. ;-) And I LOVE how much she seemed to love the quilt. She is such a special lady and she is such a joy to me and anyone who meets her.

So here is the completed quilt and even though I took my camera with me when I went to visit her. I totally spaced taking pictures of her with the quilt. But, I did take pictures of the finished quilt before I wrapped it up. So, here it is. And Corinnea, I'm so thankful that tiny, even, stitches are a thing of the past because there was no (NO) way I could have managed that in the short time I gave myself to hand quilt it!

This was taken outside.


This too.


This was taken inside. You can see the color is a bit off.


As is this.

The quilting was rather sparse. I only did the outline of each of the blocks. I used Warm & Natural batting which is my favorite because it makes the finished quilt look old fashioned. At least, that's what I think. And, I only bent three needles! But then it was a small quilt. ;-)

So. This is done and now I can get started on my kitchen cabinets. And, crocheting more doilies. Okay, it's back to work for me. And thank you all for your kind comments. Ya'll are a constant boon to my ego! Hope you all are having a great day and working on some fun projects! ;-)

Friday, February 4, 2011

Week 1


Hello everyone!

I am really excited about what I did today. Today I began a painting, worked with watercolors, with Catherine of Tigs White Canvas . And instead of my usual down playing of what I have done. I'll just post it. Although, I do have to say, I have issues with perspective! Yes. I. do! And I hope that these lessons with Catherine will help me learn/develop my sense of perspective.. So, without further ado........


I worked on it for about 2 hours (probably should have left it alone around an hour into it) and I ended up going over area's I wished I hadn't. But, oh well. This painting doesn't even look like what I was trying to paint. The actual painting looks better than the picture of it. At least, in my own opinion.

So, week 1 accomplished. Now I will go back to my quilting. Nope, still not done. But I'm getting there!

Does anyone else want to join in on the fun of painting with Catherine? Check her blog out and give it a go! I must admit, I had fun, even if painting with watercolors is a bit too loosie-goosie for me! ;-)

Have a great day ya'll!